|
|
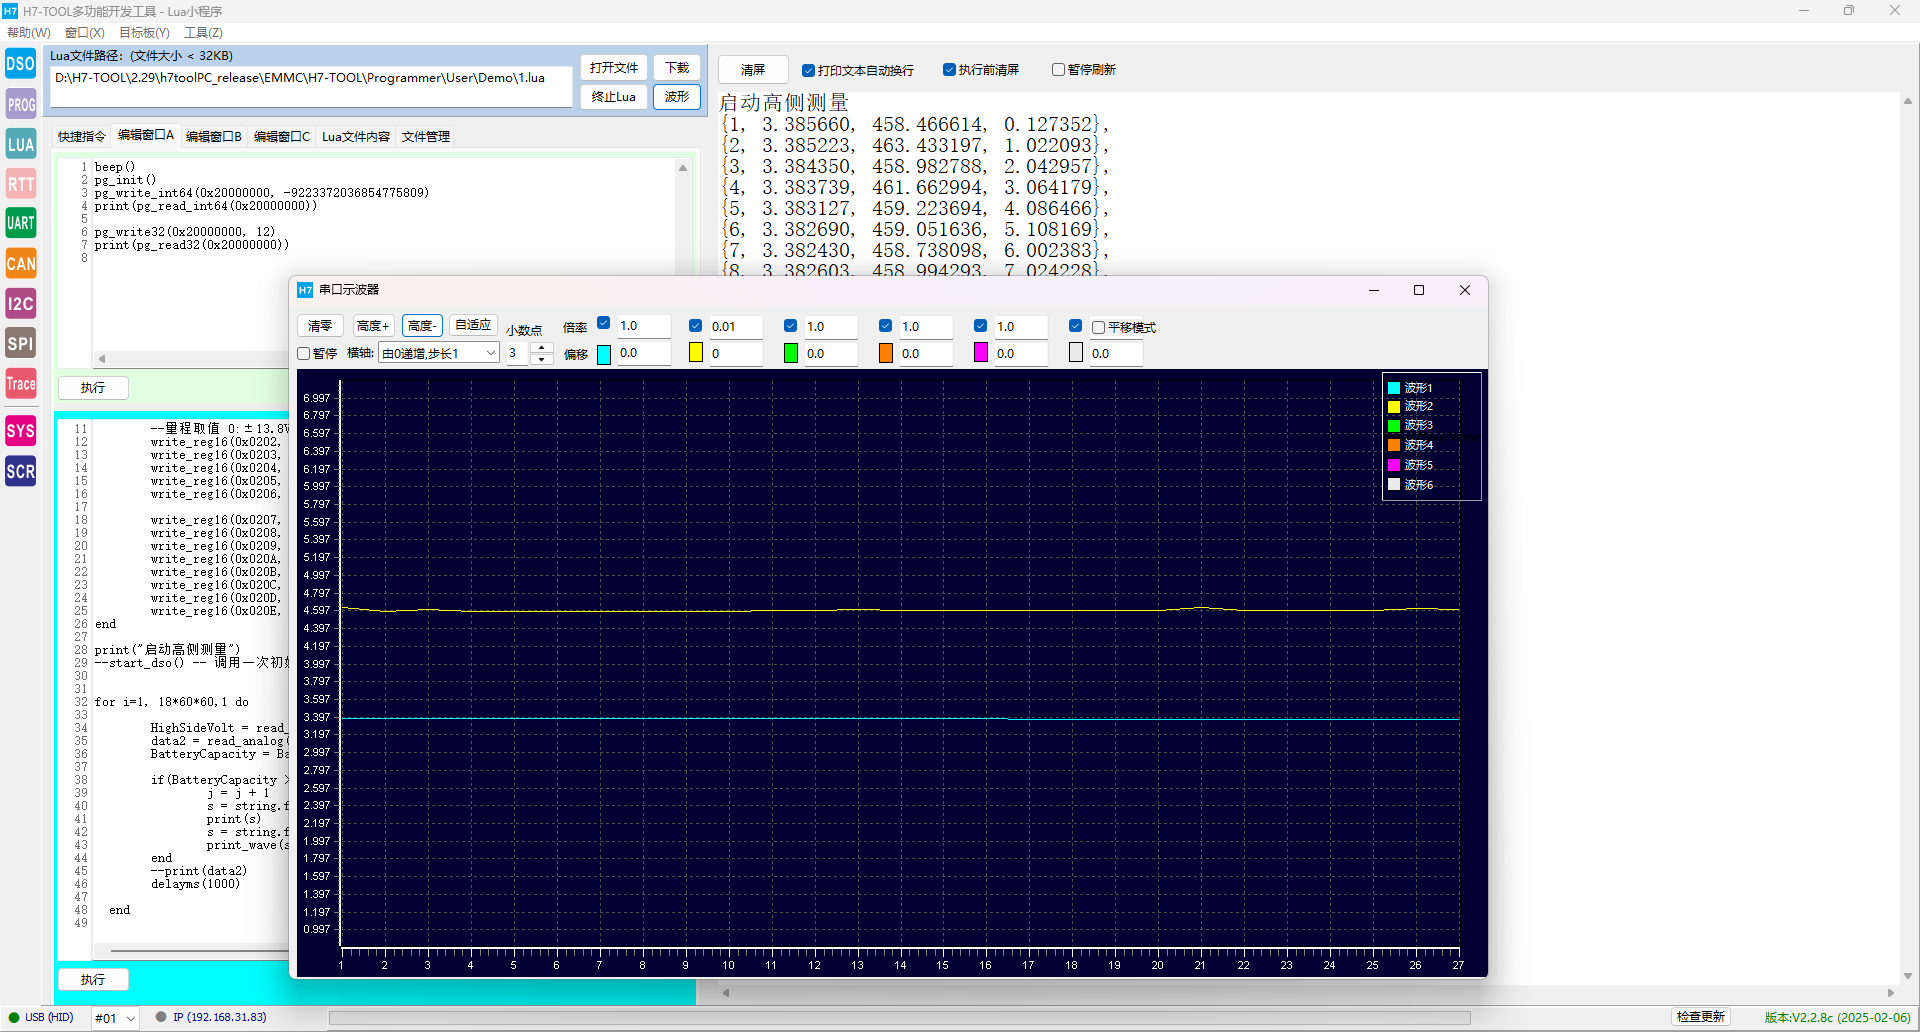
备份下测试代码:
测试1:
[Lua] 纯文本查看 复制代码 local BatteryCapacity = 0
local HighSideVolt = 0
local j = 0
--启动模拟量电路
function start_dso(void)
write_reg16(0x01FF, 1) -- 测量模式 0:示波器 1:负载电流 2:多路低速扫描
write_reg16(0x0200, 1) -- CH1耦合,0:AC 1:DC
write_reg16(0x0201, 1) -- CH2耦合,0:AC 1:DC
--量程取值 0:±13.8V 1:±6.4V 2:±3.2V 3:±1.6V 4:±800mV 5:±400mV 6:±200mV 7:±100mV
write_reg16(0x0202, 0) -- CH1量程
write_reg16(0x0203, 0) -- CH2量程
write_reg16(0x0204, 0) -- CH1通道直流偏值,未用
write_reg16(0x0205, 0) -- CH2通道直流偏值,未用
write_reg16(0x0206, 12) --采样频率 0:100 1:200 2:500 3:1K 4:2K 5:5K 6:10K 7:20K
--8:50K 9:100K 10:200K 11:500K 12:1M 13:2M 14:5M
write_reg16(0x0207, 0) --采样深度 0:1K 1:2K 3:4K 4:8K 5:16K 6:32K
write_reg16(0x0208, 32768) --触发电平ADC 0-65535
write_reg16(0x0209, 50) --触发位置百分比 0-100
write_reg16(0x020A, 0) --触发模式 0:自动 1:普通 2:单次
write_reg16(0x020B, 0) --触发通道 0:CH1 1:CH2
write_reg16(0x020C, 0) --触发边沿 0:下降沿 1:上升沿
write_reg16(0x020D, 0x03) --通道使能控制 bit0 = CH1 bit1 = CH2
write_reg16(0x020E, 1) --采集控制 0:停止 1:启动
end
print("启动高侧测量")
start_dso() -- 调用一次初始化
for i=1, 18*60*60,1 do
HighSideVolt = read_analog(0) --2 - 高侧负载电压
data2 = read_analog(3) --3 - 高端负载电流
BatteryCapacity = BatteryCapacity + data2/3600
if(BatteryCapacity > (j*1)) then
j = j + 1
s = string.format("{%d, %f, %f, %f},", j, HighSideVolt, data2, BatteryCapacity)
print(s)
s = string.format("%f, %f", HighSideVolt, data2)
print_wave(s)
end
--print(data2)
delayms(1000)
end
测试2:
[Lua] 纯文本查看 复制代码 local BatteryCapacity = 0
local HighSideVolt = 0
local j = 0
--启动模拟量电路
function start_dso(void)
write_reg16(0x01FF, 1) -- 测量模式 0:示波器 1:负载电流 2:多路低速扫描
write_reg16(0x0200, 1) -- CH1耦合,0:AC 1:DC
write_reg16(0x0201, 1) -- CH2耦合,0:AC 1:DC
--量程取值 0:±13.8V 1:±6.4V 2:±3.2V 3:±1.6V 4:±800mV 5:±400mV 6:±200mV 7:±100mV
write_reg16(0x0202, 0) -- CH1量程
write_reg16(0x0203, 0) -- CH2量程
write_reg16(0x0204, 0) -- CH1通道直流偏值,未用
write_reg16(0x0205, 0) -- CH2通道直流偏值,未用
write_reg16(0x0206, 12) --采样频率 0:100 1:200 2:500 3:1K 4:2K 5:5K 6:10K 7:20K
--8:50K 9:100K 10:200K 11:500K 12:1M 13:2M 14:5M
write_reg16(0x0207, 0) --采样深度 0:1K 1:2K 3:4K 4:8K 5:16K 6:32K
write_reg16(0x0208, 32768) --触发电平ADC 0-65535
write_reg16(0x0209, 50) --触发位置百分比 0-100
write_reg16(0x020A, 0) --触发模式 0:自动 1:普通 2:单次
write_reg16(0x020B, 0) --触发通道 0:CH1 1:CH2
write_reg16(0x020C, 0) --触发边沿 0:下降沿 1:上升沿
write_reg16(0x020D, 0x03) --通道使能控制 bit0 = CH1 bit1 = CH2
write_reg16(0x020E, 1) --采集控制 0:停止 1:启动
end
print("启动高侧测量")
start_dso() -- 调用一次初始化
for i=1, 18*60*60,1 do
HighSideVolt = read_analog(2) --2 - 高侧负载电压
data2 = read_analog(3) --3 - 高端负载电流
BatteryCapacity = BatteryCapacity + data2/3600
if(BatteryCapacity > (j*1)) then
j = j + 1
s = string.format("{%d, %f, %f, %f},", j, HighSideVolt, data2, BatteryCapacity)
print(s)
s = string.format("%f, %f", HighSideVolt, data2)
print_wave(s)
end
--print(data2)
delayms(1000)
end

|
|


 发表于 2025-3-1 05:55:39

 楼主
楼主